Educate will help you to manage your class information, from assignments and attendance to a list of student profiles. This quick guide provides you with an overview of some of the most common tasks that you will be performing in Educate, as well as some overview information about the system.
Before you can do any work within Educate, you must be able to access the system. Educate is a Web-based system which you can access in any web browser, (Internet Explorer, Mozilla Firefox, Safari, Google Chrome).
To open Educate, you will need to go to the URL (e.g., www.educate.tads.com) for your system, which you should be able to get from your system administrator. Once there, you will need to log in with your login information. No one can access the system unless that person has a profile within the system, which has login information, a permission level, and a school. This information will tell the system that you have the right to access the system, what information you should be able to see, and for which school. Using login information is important to prevent unauthorized people from viewing or changing information within the system. If you need a user profile or you do not have your login information, please contact your system administrator.
The Classroom program of Educate allows teachers and other staff members to add and update information for his or her particular courses. Assignments, attendance and students can be added in this tab. It also allows a teacher to view and edit his or her grade book for any course they are teaching.
Dashboard
The Dashboard is the first page that you will see when you open Educate Classroom. This will contain an overview of information that might be useful to you, and will provide you with quick links to information you use often. Dashboards are customizable for each person, so you may view different shortcuts and icons than another teacher.
To view any profile or record referred to on this page, click the blue hyperlinked text for that option (e.g., click the blue assignment name to view an assignment). Many of these sections will have information that automatically updates according to your work in Educate (e.g., a list of recently viewed students).
Within the Schedule section, you can click an icon to go straight to a section’s attendance, gradebook, finalized grades, students, assignments, .
Instruction Tab
The Instruction tab is where teachers and other personnel members can enter the majority of information about student's attendance and grades. The tab is split into sections based on grades and attendance.
Overview
This section provides the course section information such as the time of the course and what room it is located in.
Documents
This section allows a teacher to upload documents to a specific course section which can be viewed in the parent/student portal.
Students
This section provides a list of every student currently enrolled in a particular course. Teachers and other personnel members can click on a student's name to access his or her profile.
Staff
This section shows which staff members are assigned to the course section along with their contact information.
Assignments
Teachers and other personnel members can add and edit assignments in this section. They can also add descriptions about each assignment and add assignment values and weights.
Attendance
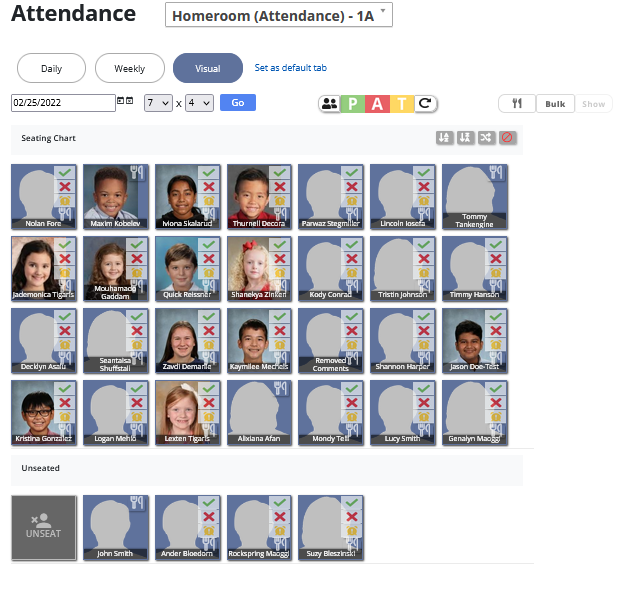
In this section teachers and other personnel members can take attendance either individually by student or as a whole class. This section provides a visual seating chart so attendance can be taken using the student's photographs.
Gradebook
Teachers can enter grades for each student in this section. Teachers also have the option of adding an assignment and exporting his or her gradebook to Excel.
Finalized Grades
In this section teachers and other personnel, members can enter final grades for students. These are grades from all assignments and with attendance factored in.
Announcements
This section allows teachers to make announcements in the student/parent portal for a specific course section.
Directory Tab
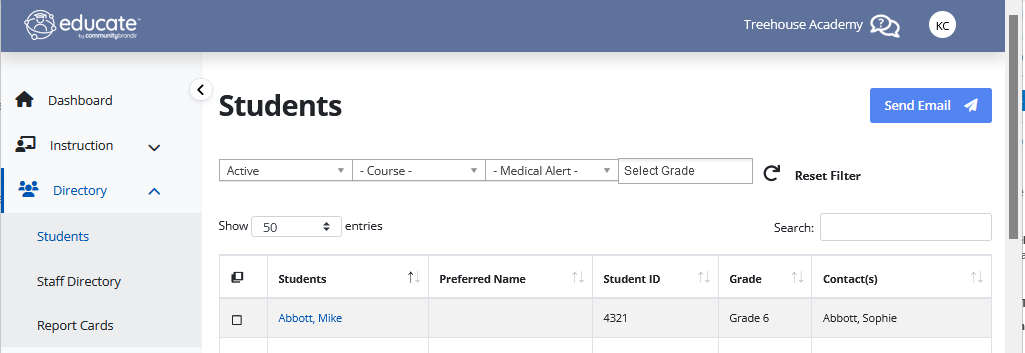
This tab allows a teacher to view a list of students, the staff directory and report cards as well as message the students or their parents.
Students
In this tab users can search for student by name, status, medical alert, or course section. Once the student is located, the user can view that student's profile. This allows quick and easy access to the number of students in a course, as well as the student's schedule. Teachers can also communicate with students and parents by using the Send Email button.
To email a student's contacts, they would first need to select a student, then select Contacts in the Send to field on the next page.
Staff Directory
In this tab teachers can view the school's staff directory and their contact information as well as view and edit their own staff information.
Report Cards
This tab allows a teacher to preview and mark as complete their students report cards in batches generated by the administrator.
Reports Tab
In the Reports tab, users can run reports on student information, such as the status of each student's assignments. Reports can be stored for later viewing.
Taking Attendance
Teachers can take attendance for their section in Educate Classroom. This allows the teacher to fill out attendance information for each student, as well as information about the student's meals.
Teachers and other personnel can setup an attendance layout using Educate Classroom's visual attendance. This allows teachers to keep an updated seating chart and allows those who may not be familiar with the students in a class to take attendance using photos.
Creating a Seating Chart
- From Educate Classroom, click the Attendance icon for the desired section from the Dashboard.
OR
Within the section, from the left menu, click Attendance. - Click the Visual tab.
The Visual page appears.
- To set the number of seats you want in this section, edit the grid numbers located above the grid.
- To set the seating chart individually, click the desired seat then select a student from the unseated table.
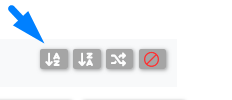
- To set all of the students at once, click the Seat students alphabetically icon.
Or select the Seat Randomly icon
- When finished, click Save.
- The layout is set.
Taking Visual Attendance
- From Educate Classroom, click the Attendance icon for the desired section from the Dashboard.
OR
Within the section, from the left menu, click Attendance. - Click the Visual tab.
The Visual page appears. - The page will default to the current date, so if you need to take attendance for a different day, type the date into the provided text box.
- To set attendance for the whole class, click one of the three Attendance Icons.
All of the student's attendance codes will change to match the icon you have chosen.
- To change a student's attendance code individually, click the Attendance icon located on his or her photo.
- Select desired attendance code.
- When finished, click Save.
The attendance for the class is taken.
Entering Grades in the Gradebook
Teachers can enter grades into their gradebook through Educate Classroom. This feature provides a centralized location for teachers to enter information for each students and each assignment.
- From Classroom dashboard click Instruction then select a section.
- Click on Gradebook, and the Gradebook page appears.
- Using Gradebook for Score based Grading
Finalizing Grades in the Gradebook
Teachers can enter final grades in Educate Classroom. These grades are the final score for all assignments and includes any adjustments made for attendance. Teachers can either use the system to calculate a final score or manually enter final scores. This final grade is the one that will display on the student's report card.


