
Users with the proper permissions can generate report cards in the Results module. This can be done after teachers have finalized grades for students. Finalized grades must be submitted before report cards can be generated. The report card templates mapped to each grade level will be used when generating the report cards, find how to review those templates here!
Watch a training video on generating report cards below!
Having trouble viewing the video? Use this instead for a larger view!
Generating Report Cards
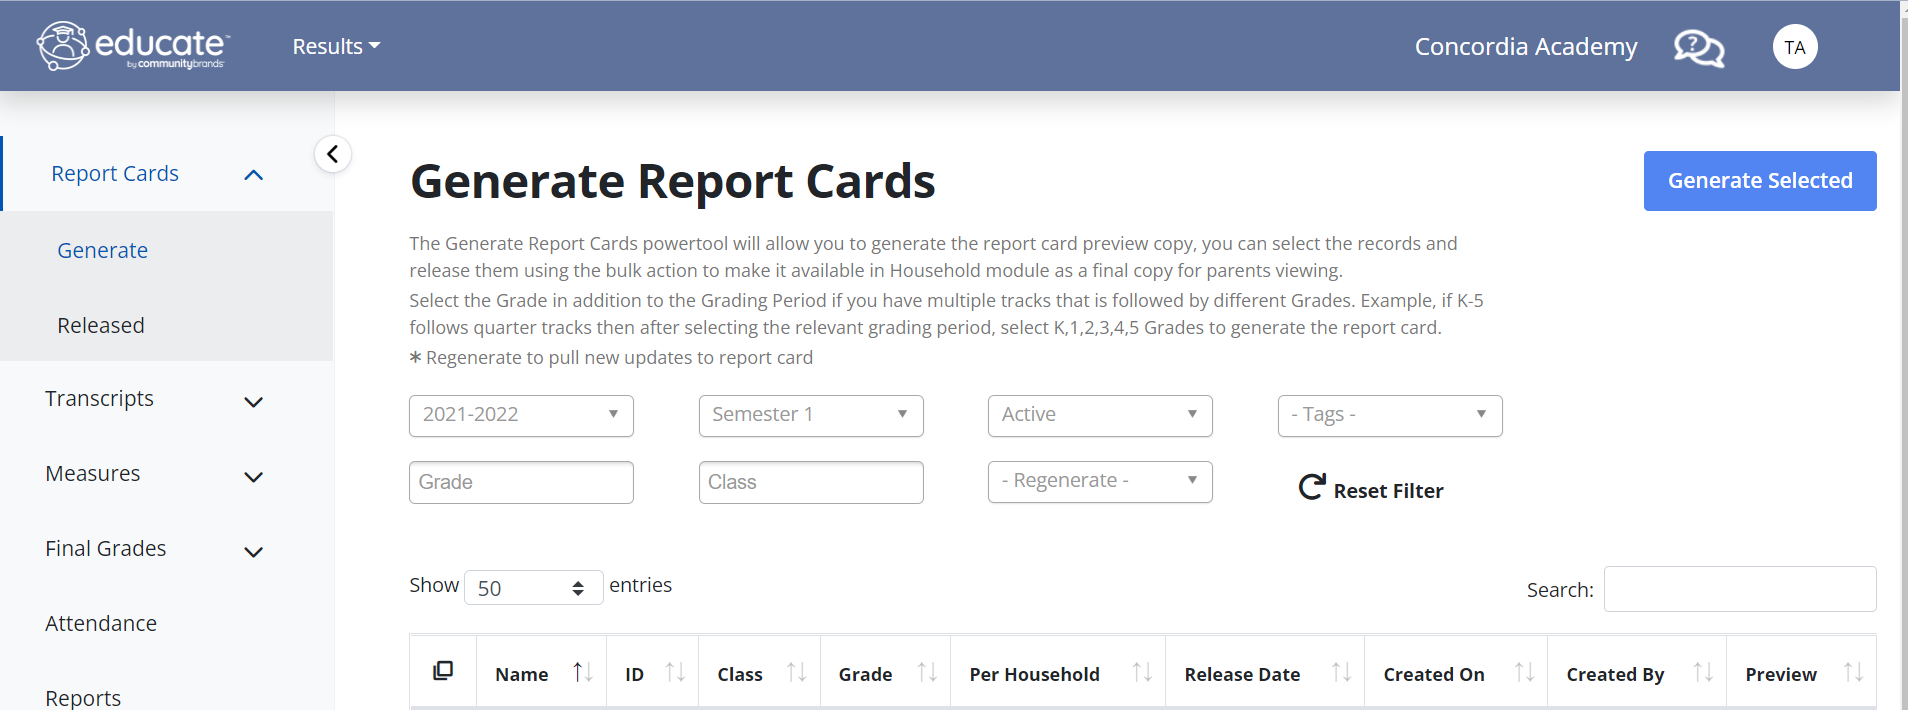
1. Navigate to the Results module.

After selecting the module, you will be brought to the Generate Report Cards page.
2. To begin generating report cards, filter for the year, grade, class, grading period, or tagged students you are looking for, using the drop-down menus available.
3. Once you have filtered for the set of students you would like to generate report cards for, check the box(es) next to their name(s) and click the "Generate Selected" button.
4. After clicking "Generate Selected," a modal will appear with the properties for the report card(s):
- Release Date: This is the date that the released report cards will be available to users via the Household Portal. The report cards will be visible at 12:00 am on the date selected.
- Generate Per Household:
- Selecting "Yes" will create a copy for each of the student's households. If you are printing copies of the report card to send home, you will want to select "Yes."
- Selecting "No" will generate only one copy for the student. If you are not printing copies to send home, and only using the electronic version in the Parent Portal, then you will select "No."
NOTE: When "No" is selected, all primary custody contacts will have access to the report card via the Parent Portal.
- Show Comments: This will allow you to choose to show comments for all grading periods, or only the most recently entered grading period's comments.
5. Set the desired properties for the report cards and select "Save."

6. The report cards will begin to generate. Once they have been generated, a PDF icon will appear in the "Preview" column. Clicking on the PDF icon will allow you to review the report card for that student.
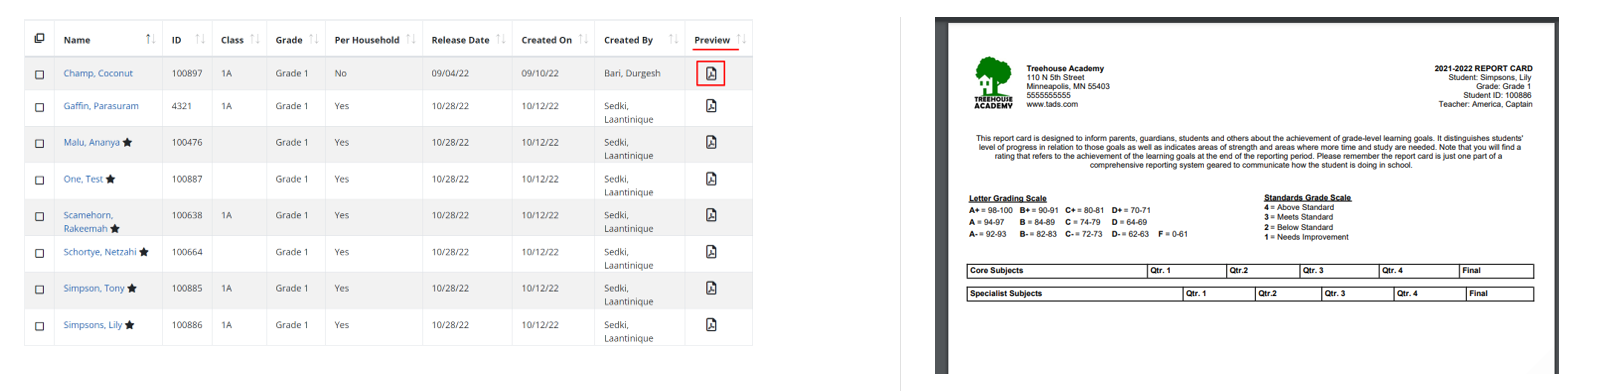
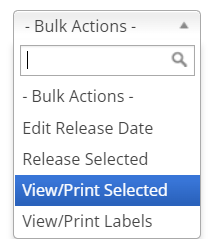
To review multiple report cards on one PDF, check the box(es) of the students you would like to review, then from the Bulk Actions menu select "View/Print Selected."

NOTE: All report cards that are still in-progress will have an "Unofficial Document" watermark, as shown on the left. This will be removed after the report card has been released.
7. If finalized grades or comments are not correct or are missing on the generated report card, administrators or teachers can correct the data. How to update the finalized data:
As an Administrator:
- Navigate to the School module.
- Click on the Instructions tab.
- Select the Course.
- Click on the Edit Icon next to the section.
- Select Finalized Grades.
- Make sure the correct term is selected.
- Correct the grades as necessary.
- Click Finalize.
As a Teacher:
- Open the Instruction header.
- Select "Finalized Grades."
- Select the Course from the dropdown menu.
- Make the necessary changes.
- Click Finalize.
Students with the asterisk next to their name have new data finalized since the report card was originally generated. These students need their report card regenerated for the most up-to-date information.

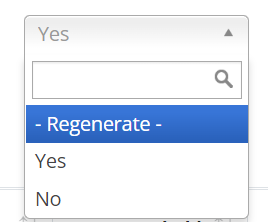
The "Regenerate" filter for the table will show all students that have updated information for finalized grades.
8. Once the grades have been corrected, return to the Results module and filter for the student(s) you need to regenerate. Check the box(es) for the student(s) and click "Generate Selected" again. You will follow the same process of setting properties for the report cards as outlined in step 4.
The regenerated report cards will have the most recently updated finalized grades and comments for the student(s). Use the reviewing process outlined in step 6 to ensure the reports are accurate.
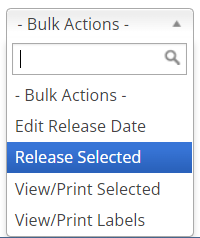
9. After the report cards have been reviewed and are ready to be made public, the next step is to release them! To release the report card(s), check the box(es) for the student(s) that you would like to release, then from the Bulk Actions menu and select "Release Selected."
WARNING: Once you release the report card(s), you cannot go back and make changes to the report cards.
10. The released report cards will move to the "Released" tab under Report Cards.

11. As soon as the report cards are released, you can now view the official copy of the report cards for each student (via Results and the student's profile in School and Classroom). The released report cards will also be live via the Household Portal based on the release date set in the properties.
Need to generate a new report card after one has already been released? You can remove the report card in the Household Module by updating the release date! Read here for steps to do this.
Printing Report Cards
After report cards have been released, you can now print the finalized documents without the "Unofficial Document" watermark.
1. Navigate to the Results module.
2. Within Report Cards select "Released."
3. Filter the students by grade, class, tag or grading period. Then, check the box(es) for the students you would like to print.
4. In the Bulk Actions menu, select "View/Print Selected."
5. A PDF for all report cards selected will open.
6. Print the PDF document.
Questions or Concerns?
Please reach out to the Educate Support Team at educate-support@communitybrands.com or by phone at 1-888-730-3256!