
Building bell schedules and periods within Educate allows you to build schedules for students and teachers, even if daily attendance is used!
How to: Build Periods and Bell Schedules
1. Go to the track under School >> Setup tab >> Setup (on left hand side) >> General >> School Years >> Select school year >> click into the desired track >> Step 3 "Manage Schedule Cycle."
2. You will be brought to tab 3.1 "Days of the Week;" please select all of the days of the week that your school operates.
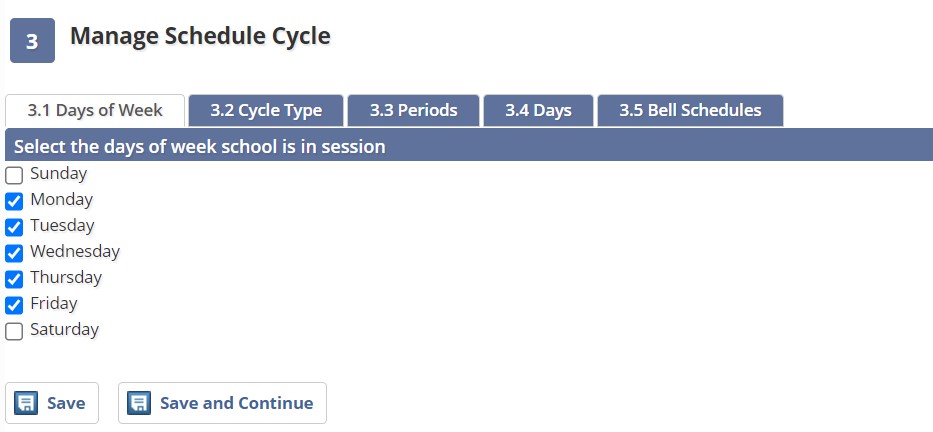
3. Select "Save and Continue."
4. Under tab 3.2 "Cycle Type" you will select the following:
- Is the schedule period based? Yes
- Is the schedule rotating weekly? Yes if schedule rotates; No if schedule is the same every week.
- Please select the schedule cycle type:
- Alternating Daily Schedule: There is a rotating daily schedule (A days and B days, or ABC days, etc.)
- Fixed Daily Schedule: Every day is the same for students.
- Fixed Weekly Schedule: Every day of the week may be different, but it does not change week-to-week (every Monday-Friday is the same every week, every Monday/Wednesday/Friday and Tuesday/Thursday are the same every week)
*For alternating daily schedules and Fixed Weekly Schedules, you will need to select the number of days in the cycle or the number of schedules. You will see an example calendar when you have entered the number for days or schedules.

5. Once you have completed all questions on tab 3.2 "Cycle Type," select to "Save and Continue."
6. The next step, 3.3 "Periods," is where you will build all available periods on any day of the week. Select "Add Another Period" and enter the name of the period. When building your bell schedule(s) you will be able to omit period(s).
To reorder the periods, simply click the row and drag to the desired location.

7. Once all periods have been built, select to "Save and Continue."
8. If you under tab 3.2 "Cycle Type" you selected either an alternating day schedule or fixed weekly schedule, you will see a tab 3.4 "Days."
Under tab 3.4, you will add the days for your schedule. You will see rows totaling the number of days/schedules set in step 3.2 (so if 2 days were selected for alternating day schedule, there will be two rows). For each the following are required:
- Day's name
- Which day(s) of the week the day(s) apply
Some examples are:

Or

*If you selected fixed daily schedule under tab 3.2, then you will not see this tab, and you can move on to step 10.
9. After all of the days have been named and associated with days of the week, select to "Save and Continue."
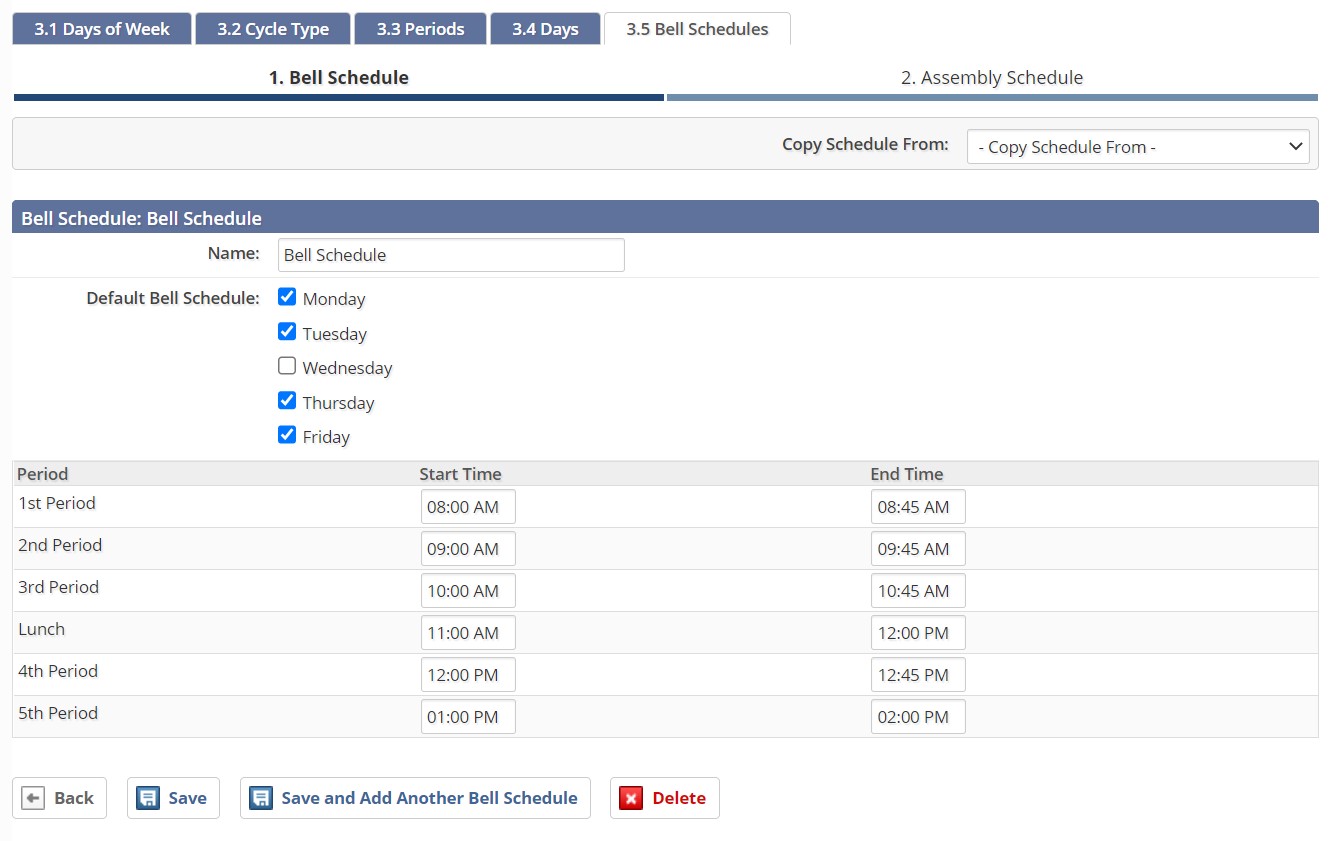
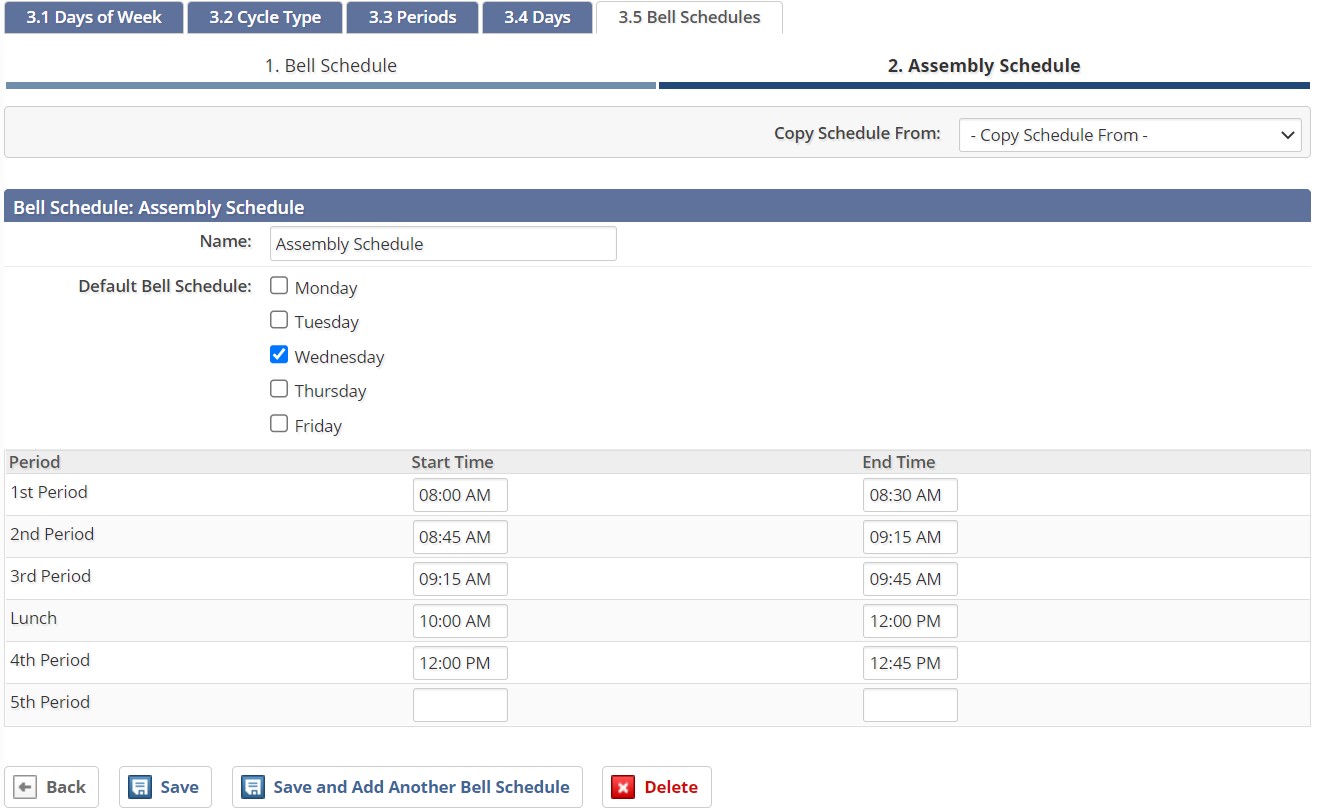
10. Under tab 3.5 "Bell Schedules" you will build your desired number of bell schedules. Each bell schedule needs a name and which days the schedule applies to, if not all.
Adding times to periods: for each period that is offered that day, a start and end time is required. If a period does not take place on that particular day, simply leave the start and end times blank.
Once the times for periods have been added for your bell schedule, select to just save or "Save and Add Another Bell Schedule."
11. After all of the schedules have been built and saved, select to go "Back to Track."
12. The final step is to generate your track calendar. If you have already generated the track calendar, you will need to regenerate the calendar to assign the bell schedules to the appropriate days.
Mapping Sections to Periods
The next step in the setup for your courses is to map the course sections to periods. Please visit this article on how this is done.
Questions or Concerns?
Reach out to the Educate Support Team at educate-support@communitybrands.com