Want to watch a form be built instead? Watch our Forms Training Video!
When clicking into the Forms tab, you will be brought to a page where you can create new forms/forms templates, view existing forms, view results, your expired and achieved forms.
To build your form, you have two options: building a new form from scratch or to select a form template.
Building a form from scratch
To beginning building your form, please select the "Create a blank form"
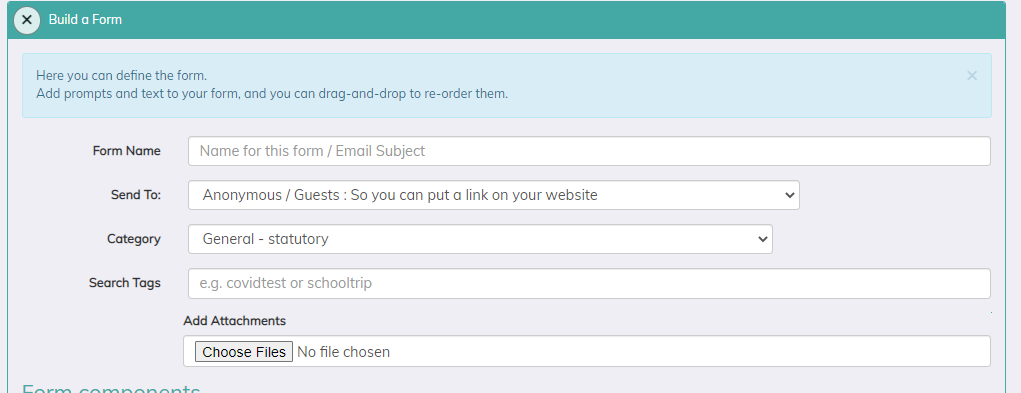
From here you will need to enter in the details of your form.
Form name: The name of the form that your recipient will receive
Send to: Leave this as "Anonymous /Guest"
Category: Select the category of your form to further sort your forms.
Tags: Add any tags that you wish to add to the form
Attachments (optional): Attach any additional documents or images that the recipients should have.
After you have filled out those details, you're ready to start adding components to your form!
For more details on what each component does, please refer to this article here.
Once your form is ready to go, click on Create Form.
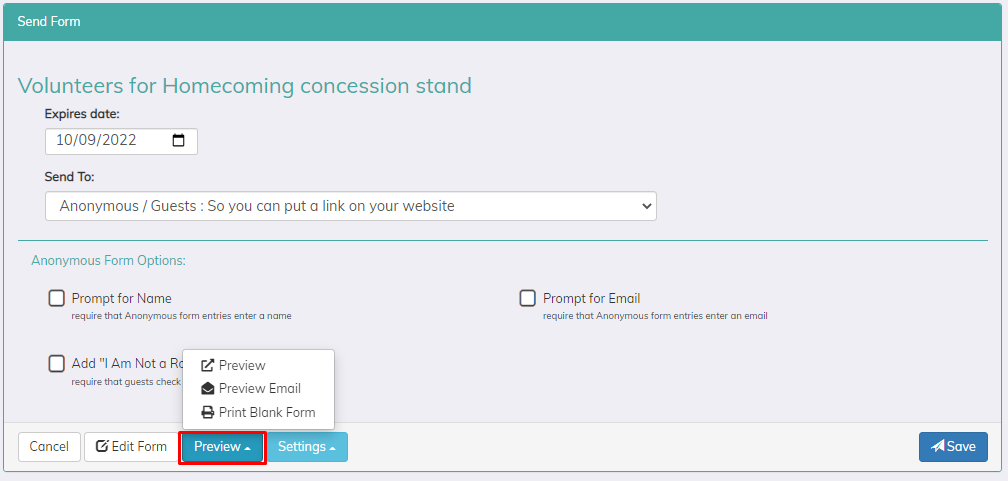
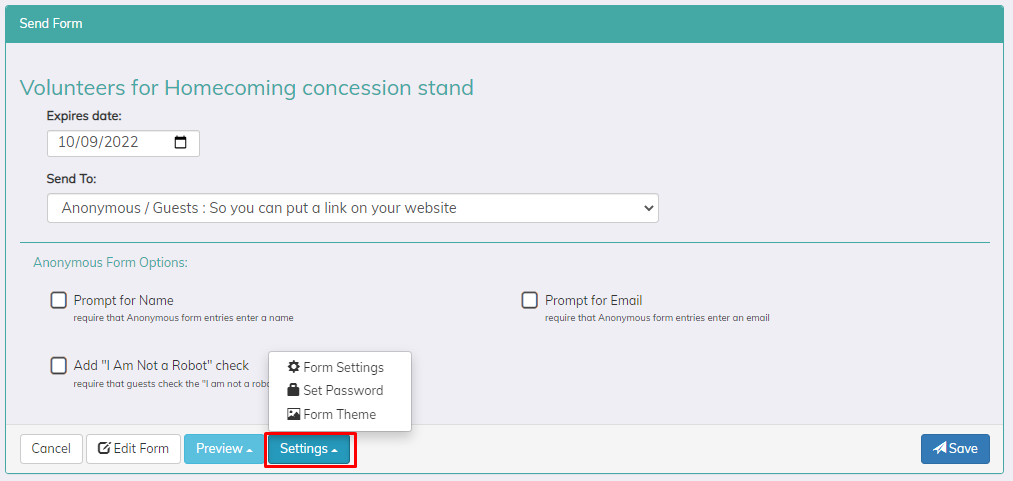
You will be able to edit the expiration date, add any other settings to the form such as a prompt for name (for anonymous entries), add a reCAPTCHA feature or a prompt for emails. You can also do the following:
- Preview the form
- Send yourself a preview of the form
- Print out a blank form
- Add a theme to the form
- Add a password
**Please note that leaving the page while adding components will discard the form and you will need to start over. If you need to leave the page, please create the form and save. This will save the form in your Draft folder.
Building a form from template
To create forms templates, please click on the Templates tab.
From here Click on the blue "Add new Template" button. You will be prompted to Name the template and add a description
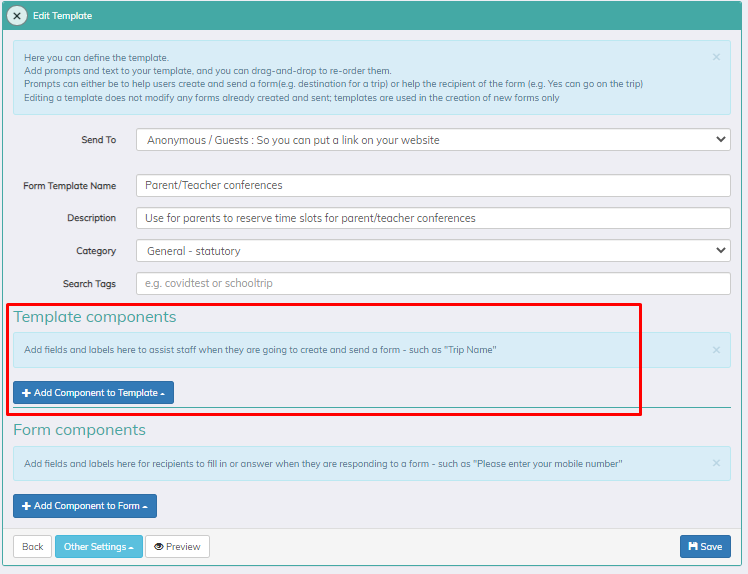
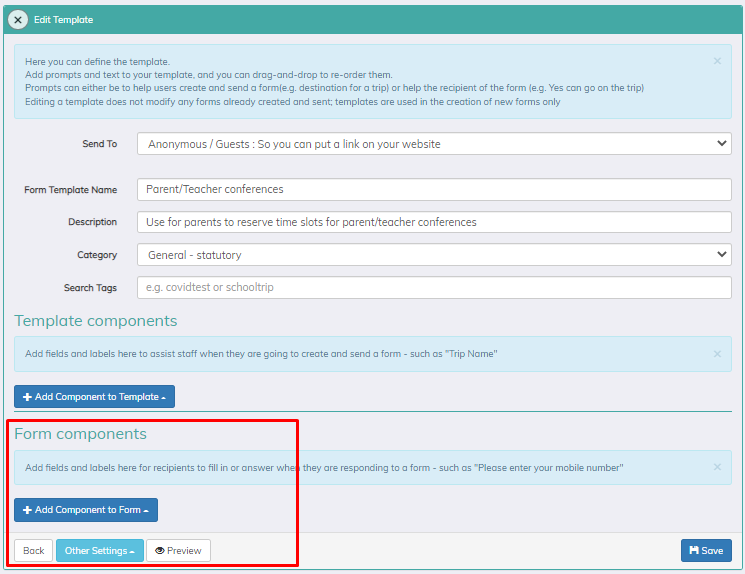
There will be two sections to build: the template component for staff members to fill out to create the template for their needs and the form component for the recipients to fill out the form to return.
Template component: These will be the fields that staff members can select to customize the form to their needs. Some examples of these might be:
- If it is a field trip template, you can build a field for the user to enter the name of the location of trip, how much it will cost, a text for a description of location, etc.
- If it is a parent/teacher conference template, you can build the fields for teacher name, available time slots, dates, etc.
Form component: These are the fields that the recipient will need to fill out. To see a breakdown of each component and what it does, this article here covers all of them in one place. Some examples of these might be:
- If it is a parent/teacher conference template, you can have the recipients enter their contact information (Name, phone numbers, email addresses), the times slot they want, etc.
Once you are complete with the template, you have several other options you can setup for the templates such as:
- Previewing the template
- Sending yourself a preview of how it would look when sent to recipients
- Changing the theme of the template
- Editing the message when recipients receive the form
- Editing the message recipients receive when they have submitted the form
- Edit the due date of the forms
- Save as a new template
When you are done making edits to the template form, you can save the template. From here, you can create a form or continue editing. After it has fully setup, users can click on "Create Form from Template", fill out the fields that need to display on the form and send it out to recipients.
Questions or Concerns?
Please reach out to the Educate Support Team by phone at 888-730-3256 or by email: Educate-Support@communitybrands.com!


