
Educate partners with USA Scheduler to help your school create a master course schedule. This article will guide you through preparing your data for use with USA Scheduler.
The USA Scheduler software is purchased directly through USA Scheduler. You will find a short video demo of the USA Scheduler here. The pricing for USA Scheduler (as of 03/2022) is listed below:
- Below 200 students : $800
- 200-500 : $1,000
- 500-800 : $1,200
- 800-1,000 : $1,400
- 1,000 above : $1,500
Please reach out to USA Scheduler directly for more information about pricing.
______________________________________________________________________________________________________________
Educate: Managing Online Course Requests and Master Scheduling
If you plan to use Educate to manage online course requests and create a master schedule, you will need to complete several steps. This document will provide you with a big picture view of the steps that need to be completed in this process.
Step 1: Rolling Over the New School Year
For this step, you will need to set up basic calendars and school year/track information. Review and update the school year data for the next year, ensuring that you set up the school year details; Tracks, Grading Periods, Schedule Cycles, Days, Periods, Bell Schedules, Grades, Classes.
Do not copy over sections, sections will be created in USA Scheduler.
Step 2: Setting Student Enrollment for the Next School Year
In this step, you will need to ensure students have been enrolled into the school year in which course requests will be placed.
Step 3: Managing the Course Catalog
In this step, you will need to make any changes to the courses being offered in the scheduling year, add any new courses and remove any courses that will not be offered.
>Each course is required to have a Course Number
>Enter information about the course in the course description field, this information will display in the course request form for students.


>When setting up the course properties, the Grade Eligibility section allows you to select which grade level(s) is eligible to request course enrollment, completion of this field is required. Note that this field indicates the student’s grade for academic year in which the course request is being placed, not the student’s current grade (if different).
>To use the scheduler, it is required that the course be enabled to Allow Online Registration.


Step 4: Setting Up Timetables
This step allows you to define properties for course requests and data for scheduling. It also activates the scheduling data for use in the USA Scheduler program. Follow these steps to complete the Timetable setup: School module >> Setup tab >> General >> Timetables >> filter for scheduling year >>Edit. Be sure to complete each step of the Timetable.
Step 5: Managing Individual Course Requests
In this step, you can enter information about course requests for a single student. This step is completed most frequently if each student sits down with a counselor to discuss the coming school year and graduation requirements, the information is then added to the course request form. Follow these steps to complete course requests: School module >> Students tab >> Directory >> select a student >> Enrollment >> Courses >> Requests >> locate course and select the Request Enrollment option.
Step 6: Managing Course Requests by Student/Household Portal (Optional)
This optional step allows student and families to log in to Educate Household to view and/or edit the course request form.

To enable this option, set permissions on the Household module for those parents and students to access the Scheduling Requests form.
Step 7: Exporting the Course Setup Details and Requests
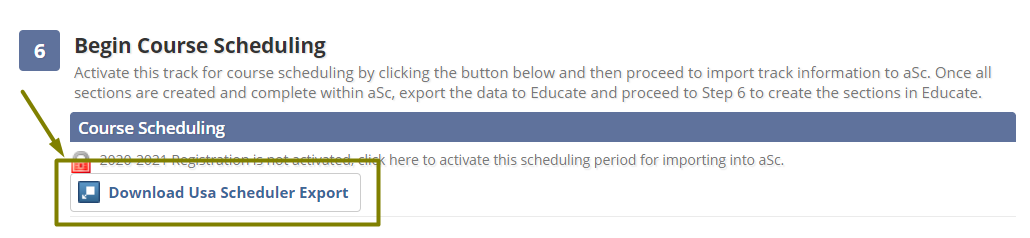
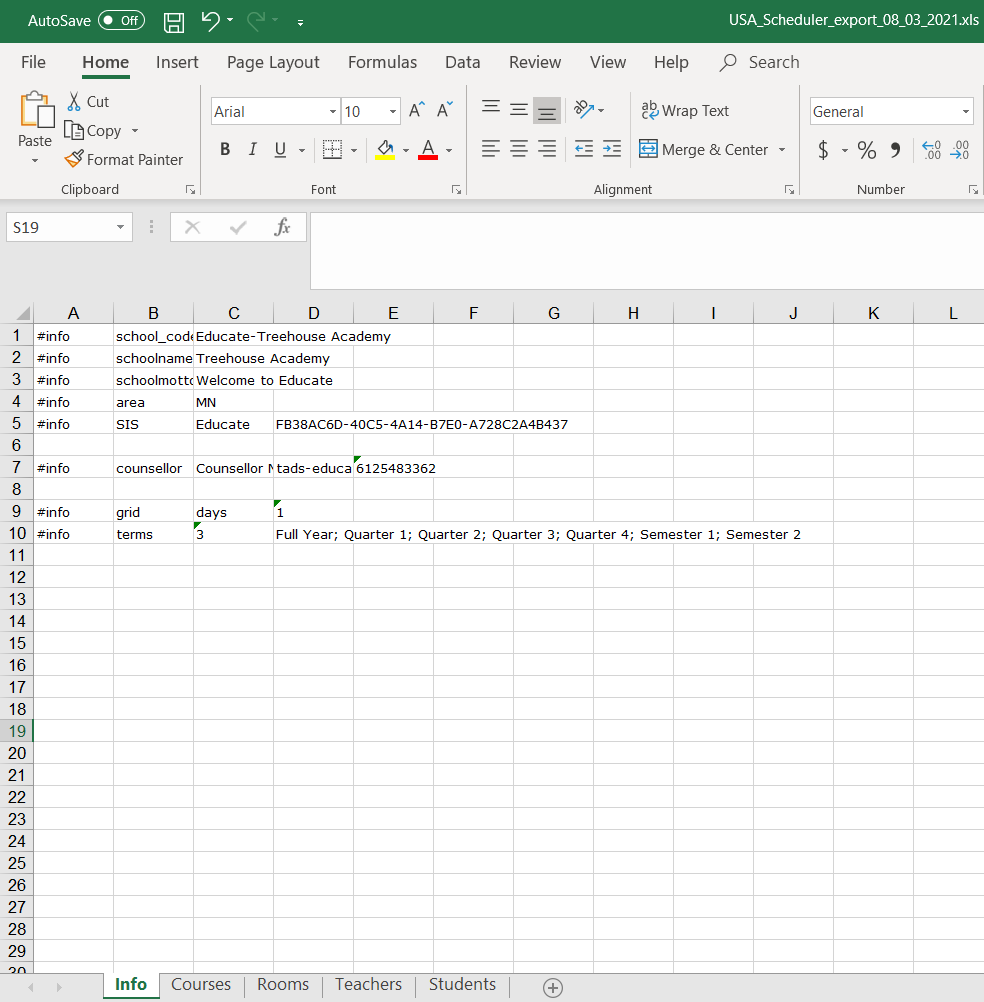
In this step you will create an export file that will later be imported into the USA Scheduler program. Follow these steps to create the export: School module >> Setup tab >> General >> Timetables >> select the academic year, then GO >> select the Track >> Step 6: Begin Course Scheduling >> click to Download USA Scheduler Export. A .xls file will be created, use this file for import into USA Scheduler.
After you have exported the file it is important that you do not make any changes to the following items in Educate or USA Scheduler:
- School Year
- Grading Terms
- Track Calendar Dates
- Buildings
- Rooms
- Day Names
- Period Names
- Schedule Cycle
- Teacher Names
- Course Names
- Student Course Requests
Changes to these items will cause your import back into Educate to be unsuccessful.
Step 8: Import your Educate Data into USA Scheduler
In this step you will import your .xls file into USA Scheduler. For additional guidance on importing the file into USA Scheduler please reach out to USA Scheduler support. https://www.usascheduler.com/
Step 9: Create Master Schedule in USA Scheduler
In this step, you will work within the USA Scheduler program to create your master schedule. Once completed, export the data for import into Educate SIS. For additional guidance on use of the USA Scheduler program please reach out to USA Scheduler support. https://www.usascheduler.com/
Step 10: Importing the Master Schedule into Educate
In this step, you will import your USA Scheduler export file. Follow these steps to import the file: School module >> Setup tab >> General >> Timetables >> select the academic year, then GO >> select the Track >> Step 7: Import Sections >> click to Import USA Scheduler >> choose your exported file >> then, select the Upload button.

Step 11: Reviewing your imported data
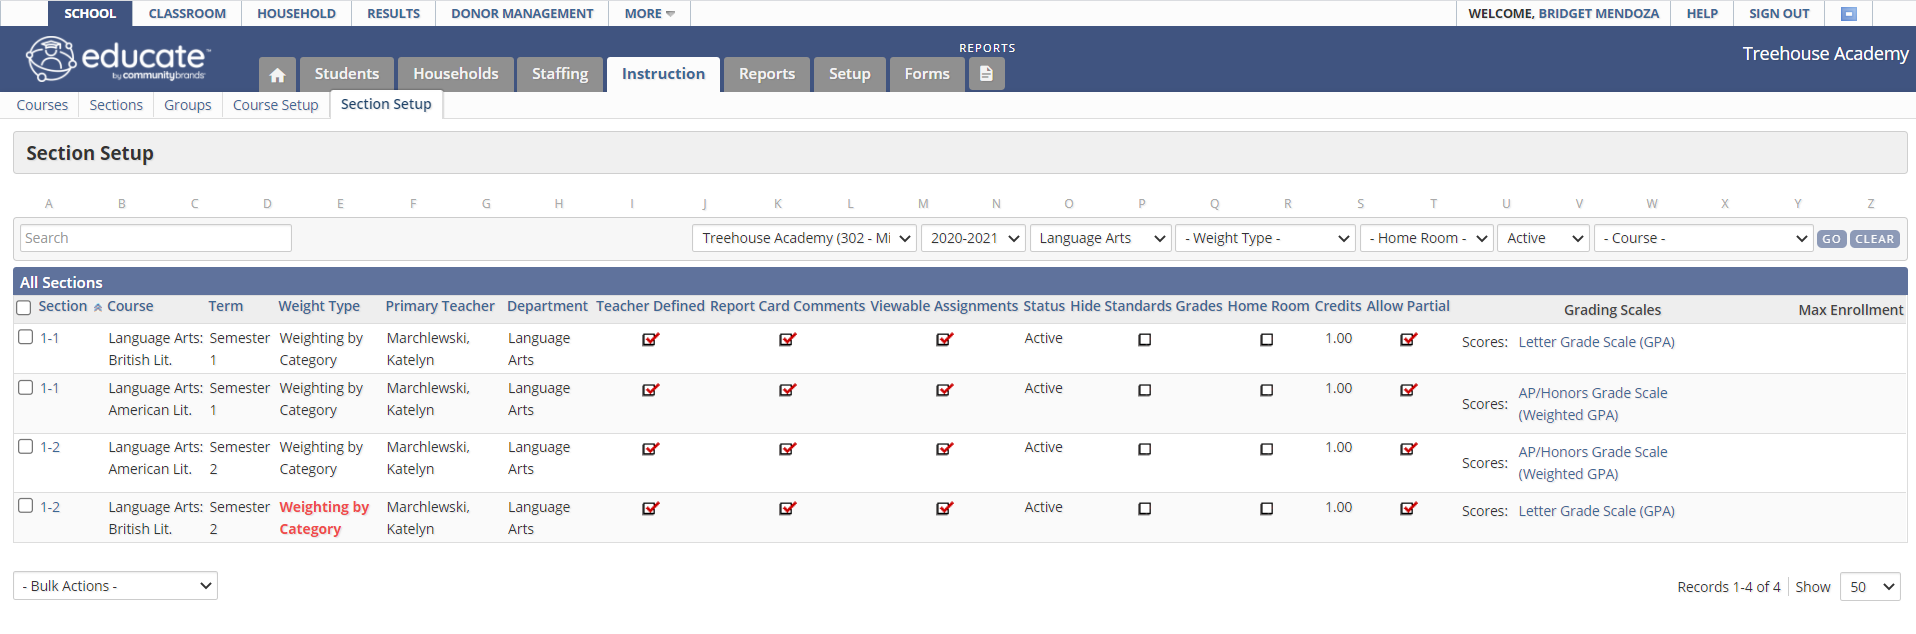
Your sections, schedule, section enrollment and staff section assignment should now be available in Educate. After your data has been imported to Educate you will want to be sure to review, and make any necessary changes in Educate. Section setup should be reviewed through the School module >> Instruction tab >> Section Setup.
Individual student schedules can be viewed through the student's profile: School >> Student >> Directory >> select a student >> Enrollment >> Schedule.
Individual teacher schedules can be viewed through the staff's profile: School >> Staffing >> Directory >> select the staff member >> Staff Information >> Schedule.


Questions or Concerns?
Reach out to the Educate Support team at educate-support@communitybrands.com or 888-730-3256!