
A partial Graduation Set is shown below, with Areas, Courses, and Credits noted; In this example, students within this Graduation Set must complete 4.0 credits of Mathematics courses and 3.0 credits of Science courses to meet their graduation requirements. The courses that meet these qualifications are listed below each area: in some situations, students may be required to complete all of the listed courses, while other situations will have a wide arrange of courses that students may choose from to meet their requirements; this will depend on the course load available at your specific school.

To create a graduation set, follow the steps below:
- From the School module, click the grey Setup tab
- Under General, click Graduation Sets
- Click the “Add a Graduation Requirement Set” button
- Complete the Graduation Set Details page by entering the following:
- Name: “Class of 2018”
- Description: Optional
- Copy Requirements: If you are adding a new Graduation Set that will closely mirror those from a previous year, you can choose to copy the requirements into this new graduation set.
- Save
- You will be brought into the Graduation Requirement Class Details screen; click the blue Requirements tab
- Within the Requirements tab, you will see the following options:
- The Add Area button is used to identify basic subjects/courses types that are required, such as Mathematics, Science, Fine Arts.
- Name: “Mathematics”, “Science”, “Fine Arts”, etc.
- Description: Optional
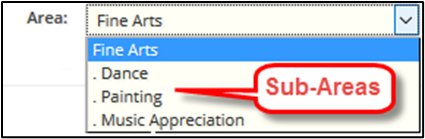
- Top Level Area: You always want to select “Top Level Area: YES”, unless this is an area that should be nested within another area (Example: Fine Arts could have sub-areas of Painting, Dance, Music Appreciation, etc., as shown below*). In all other instances you will want to select Yes so that the newly added area is separate from the others.
- Area: If this is a Top-Level Area, this is N/A. If this is not a Top-Level Area, use the drop-down menu to select the Top-Level Area you would like this nested within.
- Credits: How many total credits must students complete for this area?
- Save
- * Example of a Graduation Set that utilizes Sub-Areas in addition to Top-Level Areas: In this example, students must complete 3.0 credits within the Fine Arts area. Students must complete 1.0 credit each for the Sub-Areas of “Dance”, “Painting”, and “Music Appreciation”, the courses of which are listed below each Sub-Area (Modern Dance, etc.).
- * Example of a Graduation Set that utilizes Sub-Areas in addition to Top-Level Areas: In this example, students must complete 3.0 credits within the Fine Arts area. Students must complete 1.0 credit each for the Sub-Areas of “Dance”, “Painting”, and “Music Appreciation”, the courses of which are listed below each Sub-Area (Modern Dance, etc.).
- The Add Course button is used to specify which individual courses count towards each of these areas, such as Algebra, Geometry, Calculus, and Trigonometry within the Mathematics area.
- Name: This will populate with the Course that you select below, but can be manually adjusted
- Course: Use the drop-down menu to select a Course
- Required: Indicate whether this specific course is required to graduate
- Area: Use the drop-down to select which Area this Course should be listed within. In cases where Sub-Areas are utilized, you will see them listed as such:
- Credits: How many credits are this course worth, or how many credits of this course must students complete to meet this requirement?
- Save
- NOTE: You are able to click and drag Courses within a Graduation Set if you would like them to appear in a different order, but please note that courses can only be moved within their specified Area. It is not possible to click and drag a course from one area into another Area; if a course is added under an incorrect Area or Sub-Area, the course must be removed from the Graduation Set and re-added under the appropriate Area or Sub-Area.
- The Add Area button is used to identify basic subjects/courses types that are required, such as Mathematics, Science, Fine Arts.
- Once you have added the Area and Course requirements, click the blue Students tab.
- Click the “Add Students” button.
- Use any combination of the Search filters to locate your students, and hit the Search button.
- Check the box to the left of the students you wish to add to this Graduation Set. If you are adding all students that pulled up from your search, you can check the box to the left of “Name” to select all listed students. Click the “Add Selected” button to finish adding these students to the Graduation Set.
- You will see a banner confirming these students have been added to the Graduation Set.
- Congratulations: you have completed the setup of your Graduation Set! You can now run the “Graduation Requirement Report” to view student progress toward these Graduation Requirements! This report is available within the School module, under the grey Reports tab. You can locate this report by typing “Graduation” into the Search bar, or by opening the Scheduling folder.


Questions or Concerns?
Please reach out to the Educate Support Team at educate-support@communitybrands.com or by phone at 1-888-730-3256!